Posts

Showing posts from 2010

Arduino Robot 3 - Line Follower (Goals & Notes)

Work has begun on my third Arduino Robot. I decided that after some comments I read in various forums, that making a line following robot would probably be a proper increase in challenge. With research in hand, I placed my orders for parts and began looking into creating a test track. Here are the goals for Arduino Robot 3 - Line Following Tank: Conform to Robo Games Line Following Rules (2010)   Use only a single sensor. Robot should move in a smooth motion (no twitching about the line) I have begun the physical build, but I'm still looking into a 'practice arena'; I may end up taping together printer paper... Full report, code and video upon completion (so check back here). Edit: The reason for the single sensor goal is because someone trying to do similar with a Lego robotics set would only have one sensor. I do not want to be putting more money/hardware into any of the robots. They should be a challenge; and with my programming background I think that even two s

Arduino Robot 2 - Wandering Tank

Image
My second robot was a bit more complex and ended up taking twice as long to build as originally intended. The budget changed, the designed changed, and my understanding of Robotics in general changed. The second robot is an attempt to make an obstacle avoidance robot that isn't overly simple. I will be outlining the goals, budget, build and code for Wandering Tank. The goals for Wandering Tank were simple: Should be able to scan an area in front of itself. Should be able to avoid not only walls, but obstacles. Avoid random decision making; the robot should use information when avoiding. Wandering tank meets these goals, and also looks pretty cool doing it. The code for the robot will show how the third goal is met and the other two will be obvious in the video. The budget for Wandering Tank was quite cheap. Since I started with Robot 1, the only additional cost for Wandering was the sensor and the servo. Robot 1 ($98.00) Sensor - Digital Distance Sensor 10cm $6.95 + $2.00

Arduino Robot 2 - Part 1 - Forward Scanner

Work has been coming along well on the development of the second version of Arduino Robot. There have been multiple set backs; the biggest of which is my purchase of a continuous rotation servo instead of a normal one. Otherwise the bot is constructed and mostly works in tests. The goals for Robot 2 were a step up from Robot 1: Ability to continually scan in front of itself. Ability to back and turn to avoid obstacles. Smoother movement. Basically Robot 2 is a wandering avoidance robot; called Arduino Robot 2 - Wandering Tank. For this to work, I needed some type of affordable sensor to place at the front of the robot; and from there the ability to look around with it. My solution was to mount a sensor on a servo. The servo would be used to sweep across a selected field of vision looking for possible collisions. So Wandering Tank has to do the following: Move Forward Scan left to right Move backwards while object detected Turn after object no longer detected  Repeat  Becaus

Arduino Robot 1 - The Basic Tank

Image
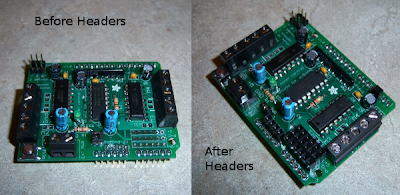
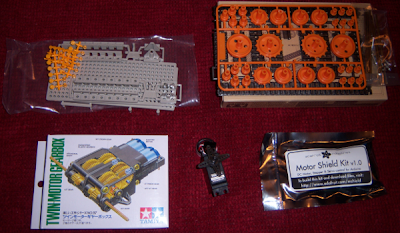
What you see below is the result of my first attempt at building a robot. The goal was to build something Arduino based. It would move forward, turn around, come back; and then turn around again to be in its original position. Finally, I wanted to try multiple part selling web sites, to get experience with who to buy from. Fortunately; they were all better than expected experiences. My Arduino was a Christmas present; but I will be factoring 32.00 into the cost of the project to account for it. The first phase was an order from SuperDroidRobots.com. Tank treads, a double motored gear box, and some plastic to build a chassis came in at $40.00. The second order was from Adafruit.com, for a continuous rotation servo and an Arduino Motor Shield. The Adafruit order also came in at $40.00. Subtracting the cost of the unused Servo, this robot is built for just under $100.00. You can see the initial parts order below. I started by building the motor shield, this is the motor shield kit wh

Fixing a dead Sansa MP3 player (Versions e200 e260 e280)

Image
First, here is the player we are discussing, or at least your average version: Although if you are here, you probably don't see the nice shiny interface above. That's a shame, but we'll try to fix it. This all started for me when a friend got a bag of crap from Woot! Among the loot, were quite a few dead Sansa e2XX players. You have to use the e200 tool to reflash them, it works better under Linux, and I run Linux (Ubuntu if you must know). So I ended up in a deal where I would try to fix all three. They were all fixed, and below I share how I eventually got all three working. There are many posts on the web about how to fix these. They involve going into factory mode and flashing the firmware. Unfortunately a measurable percentage of people find that to be completely useless because if you can't get the device into factory mode then you can't update the firmware. Let's troubleshoot a Sansa MP3 e2XX player. Keep following these steps, if you make it to t